Web API As Azure Function - HttpTrigger


In Previous blog post, there is some basic introduction about different hosting mode for Azure Function.
In this post, I will be more practical and jump to more practical stuff and provided information around using asp.net core web api as Azure Function.
Tools
Visual Studio 2022
Azure Function Core Tools v4
.net 6 SDK
Prepare Azure Function Trigger, Binding and Configuration
Create Function Definition and Binding Configuration. For this article I will focus on HttpTrigger function. ( Next Part something about other trigger like ServiceBus Trigger)
Create one directory. ( For this example I will create directory at C:\CustomHandler)
In that create one more directory called HttpTrigger.
In that create file named function.json with following content.
{
  "bindings": [
    {
      "authLevel": "anonymous",
      "type": "httpTrigger",
      "direction": "in",
      "name": "req",
      "methods": [
        "get",
        "post"
      ]
    },
    {
      "type": "http",
      "direction": "out",
      "name": "res"
    }
  ]
}
In above configuration try to define following things.
Trigger is HttpTrigger
Its direction is input.
name of parameter that contains the request is 'req'
Method accepted by this is either get or post.
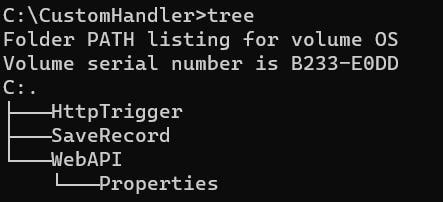
Structure is looks like following.
In C:\CustomHandler Create two more files. One is host.json and another is local.settings.json. (local.settings.json only required for local env.)
Content of host.json.
{
    "version": "2.0",
    "extensionBundle": {
        "id": "Microsoft.Azure.Functions.ExtensionBundle",
        "version": "[3.*, 4.0.0)"
    },
    "customHandler": {
        "description": {
            "defaultExecutablePath": "dotnet",
            "defaultWorkerPath": "run",
            "workingDirectory": "C:\\CustomHandler\\WebApi",
            "arguments": []
        },
        "enableForwardingHttpRequest": true
    },
    "extensions":{
        "http":{
            "routePrefix": ""
        }
    }
}
In above configure in next step we will create web api.
Content of local.settings.json
{
  "IsEncrypted": false,
  "Values": {
    "AzureWebJobsStorage": "UseDevelopmentStorage=true",
    "FUNCTIONS_WORKER_RUNTIME": "custom"
  }
}
After above configuration, you can good to go run func. ( It will give you error as currently API is not created ). Let's see
Go to C:\CustomHandler and execute following command.
func start
Result will be like following.

Create Web API
For this example, I am going to use Minimal API but it is very much possible with Controller based request as well.
Create Directory called WebAPI in C:\CustomHandler.
Go WebAPI directory and execute following command.
dotnet new webapi -minimal
It will look something like this.
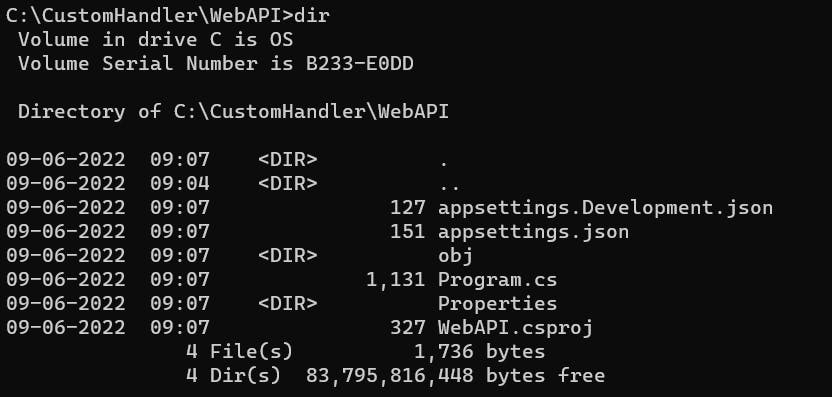
Go to Program.cs and I am making minimal to more minimal.
Use following content for
program.cs
var builder = WebApplication.CreateBuilder(args);
builder.Services.AddEndpointsApiExplorer();

var app = builder.Build();
app.Map("/HttpTrigger",()=>{
               return "Hello From HttpTrigger Web API";
});

app.Run(
    string.Format("http://localhost:{0}",
    Environment.GetEnvironmentVariable("FUNCTIONS_CUSTOMHANDLER_PORT") ?? "5000"));
- Above code one thing to remember is following line. In this if It get port no from Environment variable then it uses that otherwise 5000.
app.Run(
    string.Format("http://localhost:{0}",
    Environment.GetEnvironmentVariable("FUNCTIONS_CUSTOMHANDLER_PORT") ?? "5000"));
Let's run Web API alone and check it is working or not. Run following command at C:\CustomHandler\WebAPI
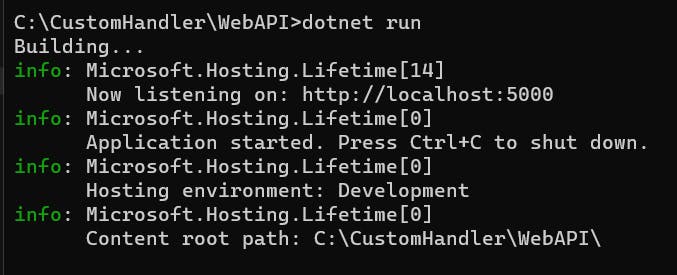
Go to Browser and call end point localhost:5000/HttpTrigger
Following is the result.

At this point we have function configuration is ready and also Web API is also running. Now it is time to check those things in integration.
Now let's go to C:\CustomHandler directory.
Execute following command.
func start
Now this time API is there, so it run successfully and display following.
Execute Function EndPoint in Browser.
Overall request flow looks like this.
Advanced Configuration
Is It Required to HttpTrigger as EndPoint name in Web API ?
No. This can be controlled two way by Function name and route for HttpTrigger.
Solution 1: Using Function Name
For example if Function name is saverecord then WebAPI needs respective endpoint. Just copy the HttpTrigger directory and rename it with SaveRecord.
If you run func start then it will look like following.
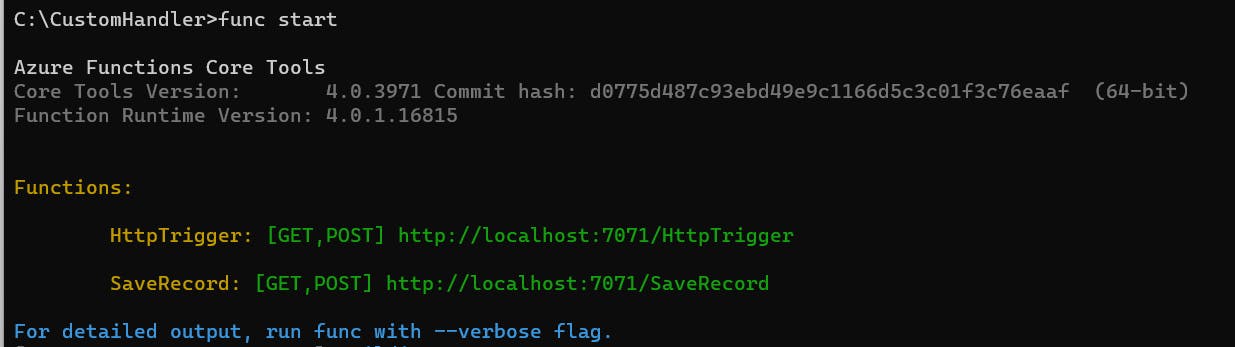
Now It is required to SaveRecord as EndPoint in WebAPI.
Solution 2: Using Route
Let's say you want to use SavePerson instead of SaveRecord.
Go to SaveRecord Directory. Open function.json.
add route attribute.
{
  "bindings": [
    {
      "authLevel": "anonymous",
      "type": "httpTrigger",
      "direction": "in",
      "name": "req",
      "methods": [
        "get",
        "post"
      ],
      "route":"saveperson"
    },
    {
      "type": "http",
      "direction": "out",
      "name": "res"
    }
  ]
}
- Now if
func startthen it display following.

In above all discussion there is no discussion for Http Verb and It is because that you can use any verb supported by function and webapi.