Import Azure Functions Into API Management Service Using Swagger/OpenAPI And Automate Using Azure DevOps


In one of previous post there is discussion around Azure Functions Swagger/Open API integration. It will be found here .
Now above is first part of integration. Now let's say when Azure Function App updated with new function or change in OpenAPI/Swagger specification then automatically it needs to imported into Azure API-M.
From DevOps perspective, following steps are required.
Azure Function App Update or Added with OpenAPI/Swagger specification.
Once It is done, change is being publish to Azure Functions.
So far so good. Now if there is default configuration and for example function app url at location https://functionappmy.azurewebsite.net then swagger url looks like following https://functionappmy.azurewebsite.net/api/swagger.json.
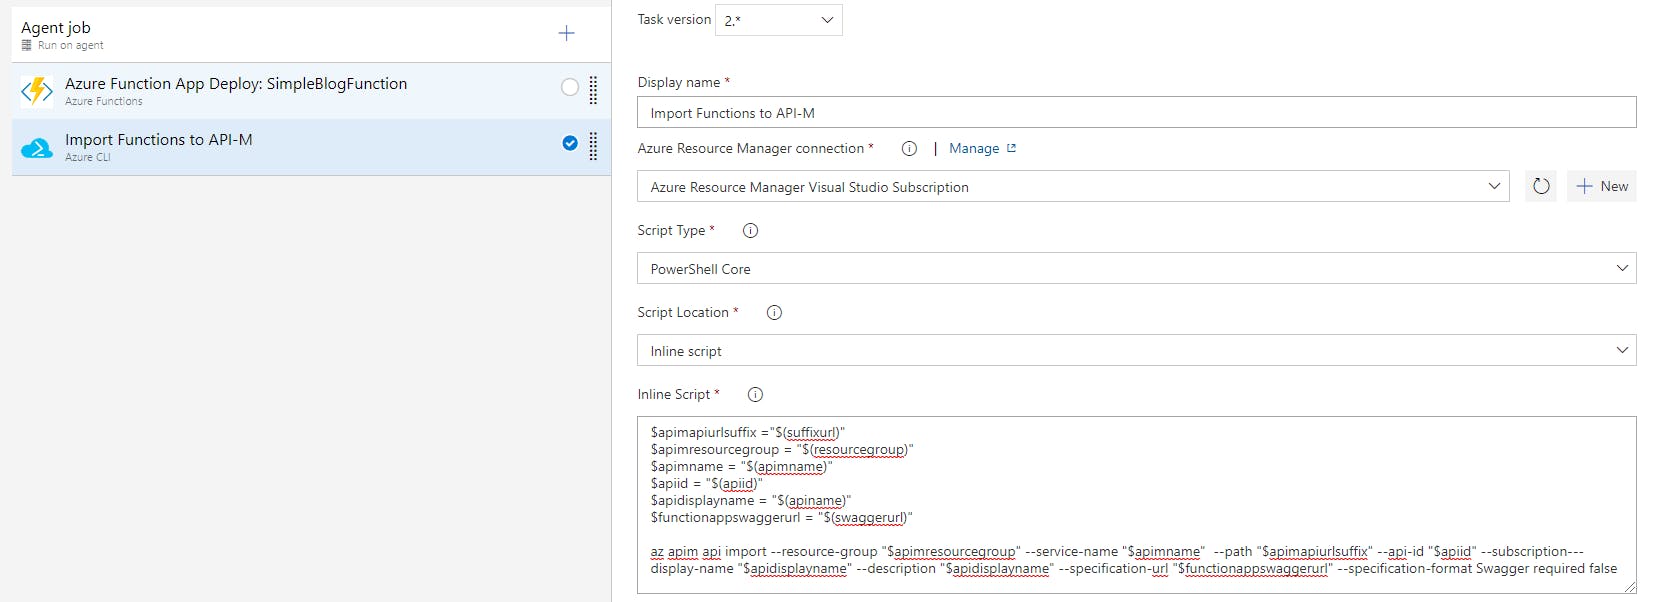
Now execute following command from Azure Cli with the same subscription as API-M created.
$apimapiurlsuffix = 'api/route1'; # //routesuffix for api at api-m level
$apimresourcegroup = 'rg1'; # //resource group of api management service
$apimname = 'sampleapimservice'; # // api management service name
$apiid = 'apiid1'; # // identify api in API-M
$apidisplayname = 'api-id-one'; # // display name of api
$functionappswaggerurl = 'https://functionappmy.azurewebsite.net/api/swagger.json';  # //any swagger url

az apim api import --resource-group "$apimresourcegroup" --service-name "$apimname"  --path "$apimapiurlsuffix" --api-id "$apiid" --subscription-required false --display-name "$apidisplayname" --description "$apidisplayname" --specification-url "$functionappswaggerurl" --specification-format Swagger
Above code, first all variable declared and assigned with value and based on environment it needs to be replaced.
Finally az apim api import will do trick and import swagger file ( this can be any swagger file ) and based on that API created and operation imported.
Now Let's automate everything using Azure DevOps.
Create Build Pipeline For Function app.
- Code is already present at following location. Repository
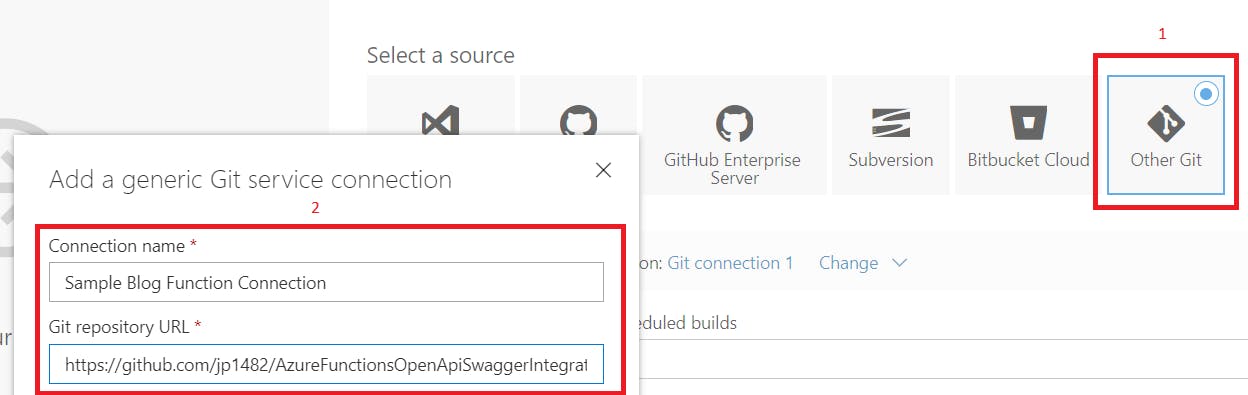
Go to Azure DevOps and go to your organization and project. Once at Azure DevOps project and create new build pipeline and using it in Classic Editor.
Go to other git and create new connection. As github repository is public no credential required.
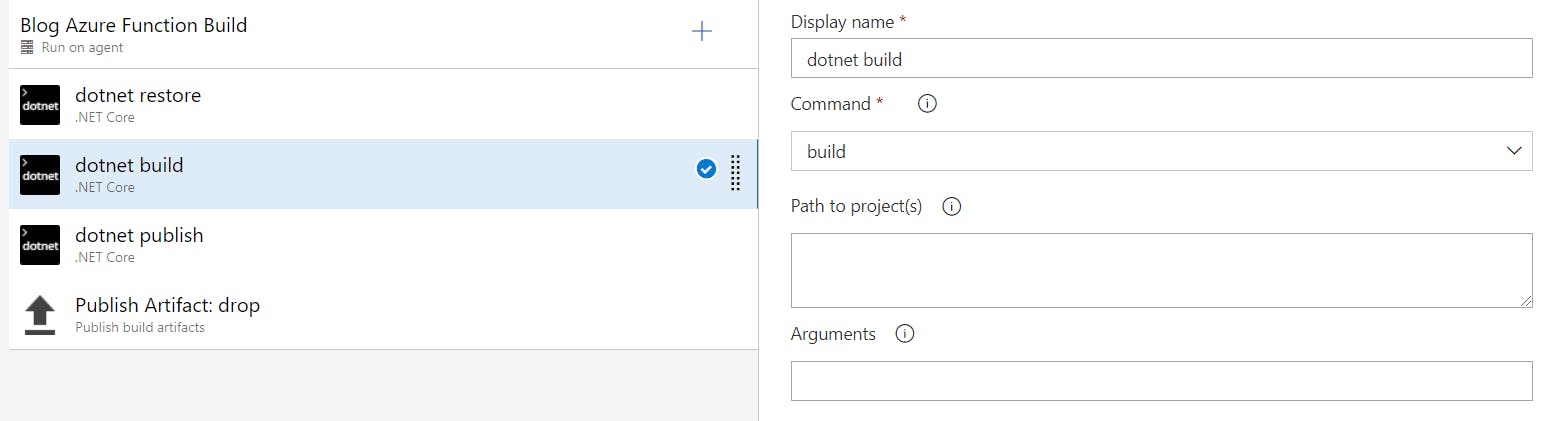
Add agent job and add .net core task.
First task is for dotnet restore package.
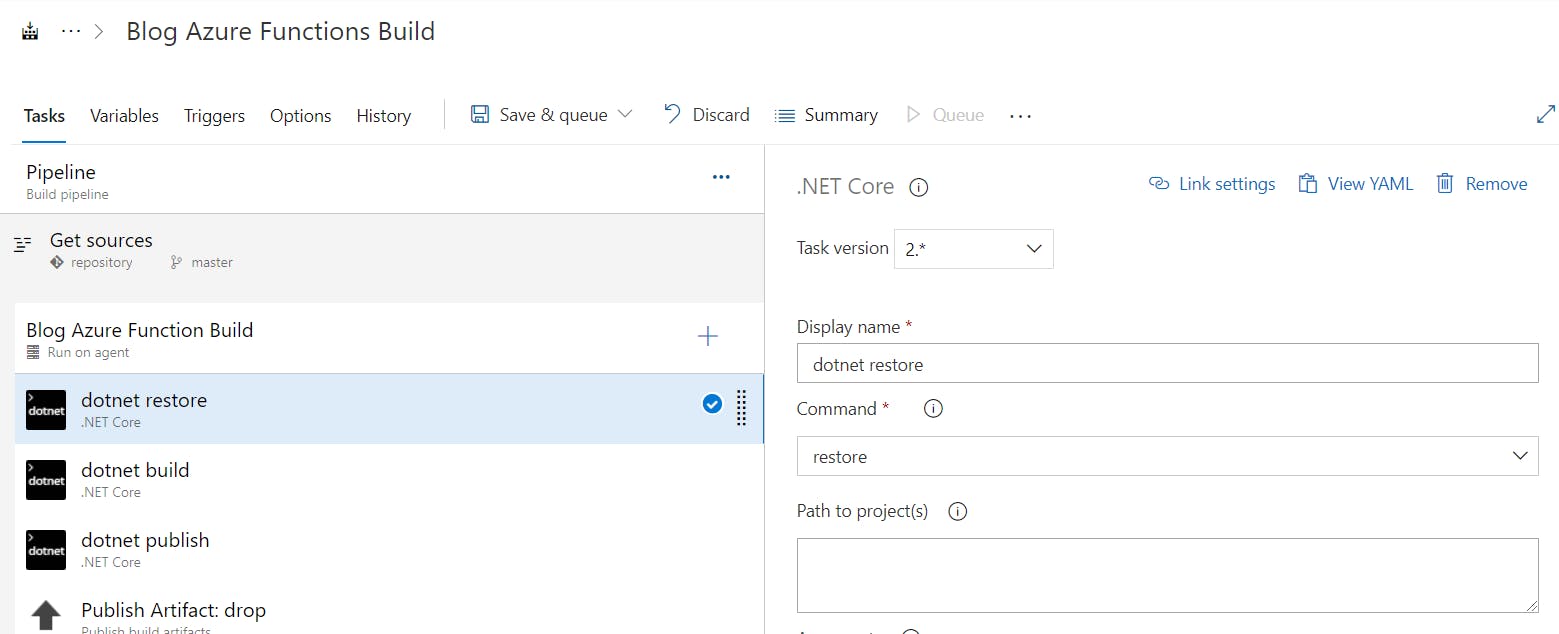
Second task is for dotnet build for project.
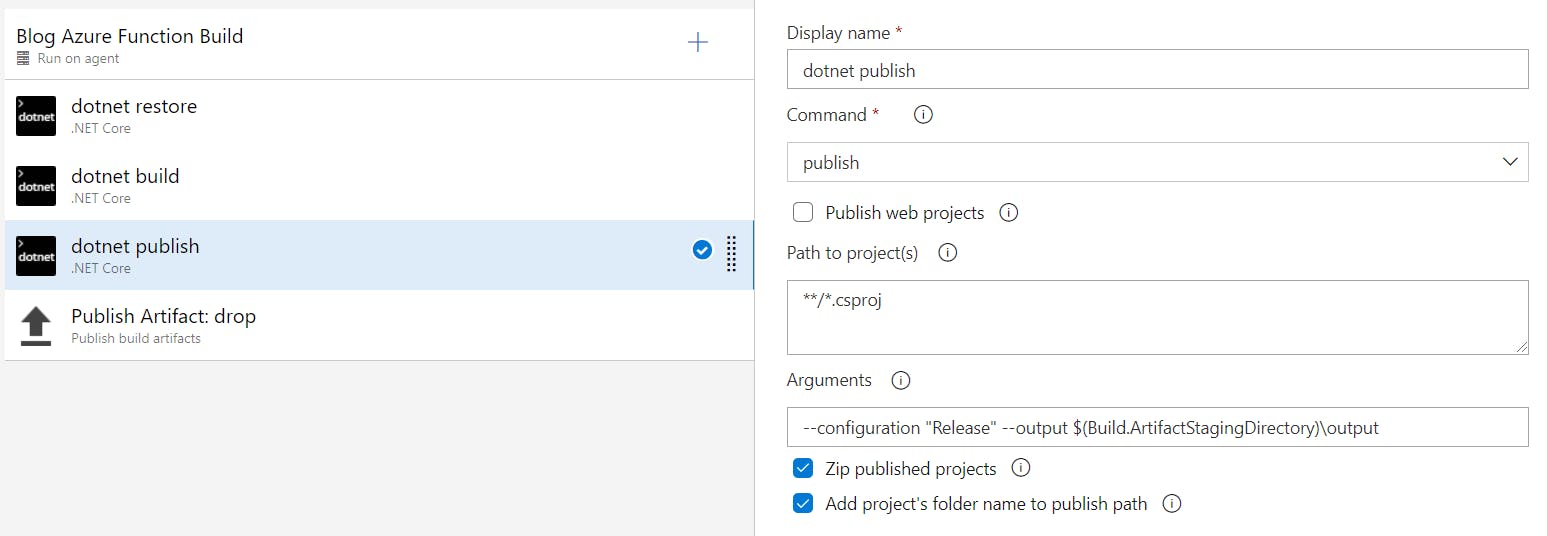
Third task is for dotnet publish project. Here make sure that --output contains proper path and same needs to use during publish artifacts. ( for example over here $(Build.ArtifactStagingDirectory)\output)
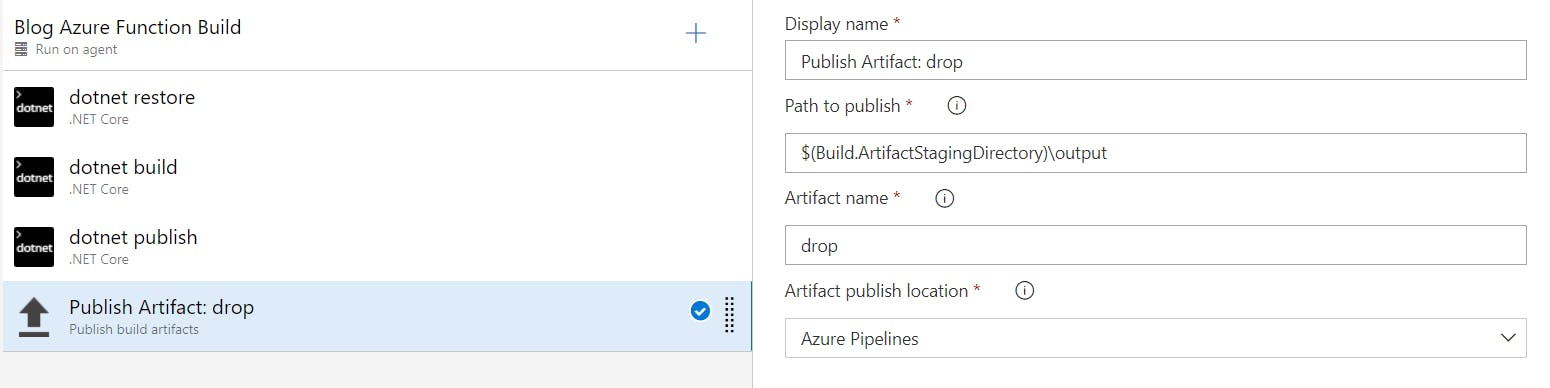
Last task is for publish build artifacts.
Create Release Pipeline For Function app.
Now create release pipeline and it will popup to choose template. Choose empty.

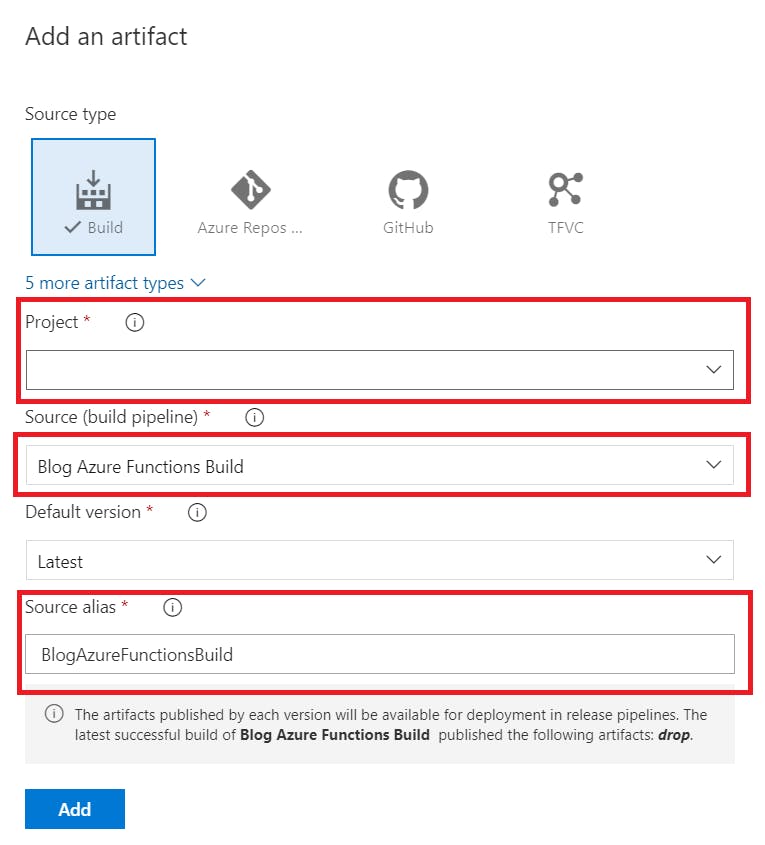
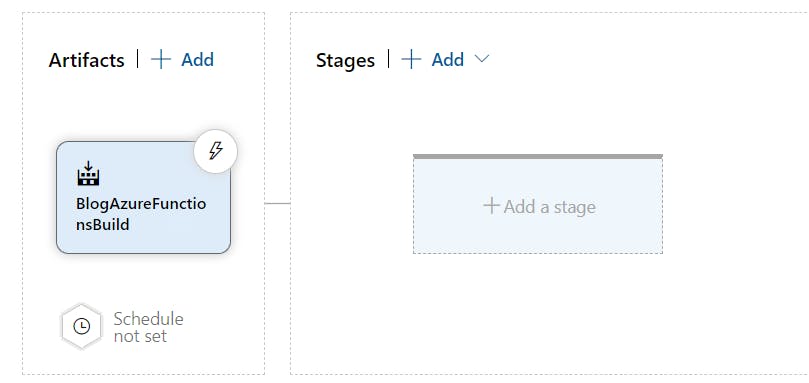
Now add artifact. Select project, build pipeline and give sourcealiasname.
It will look something like this at current moment.
Now select stage and select empty then add agent job and then select Azure functions task.
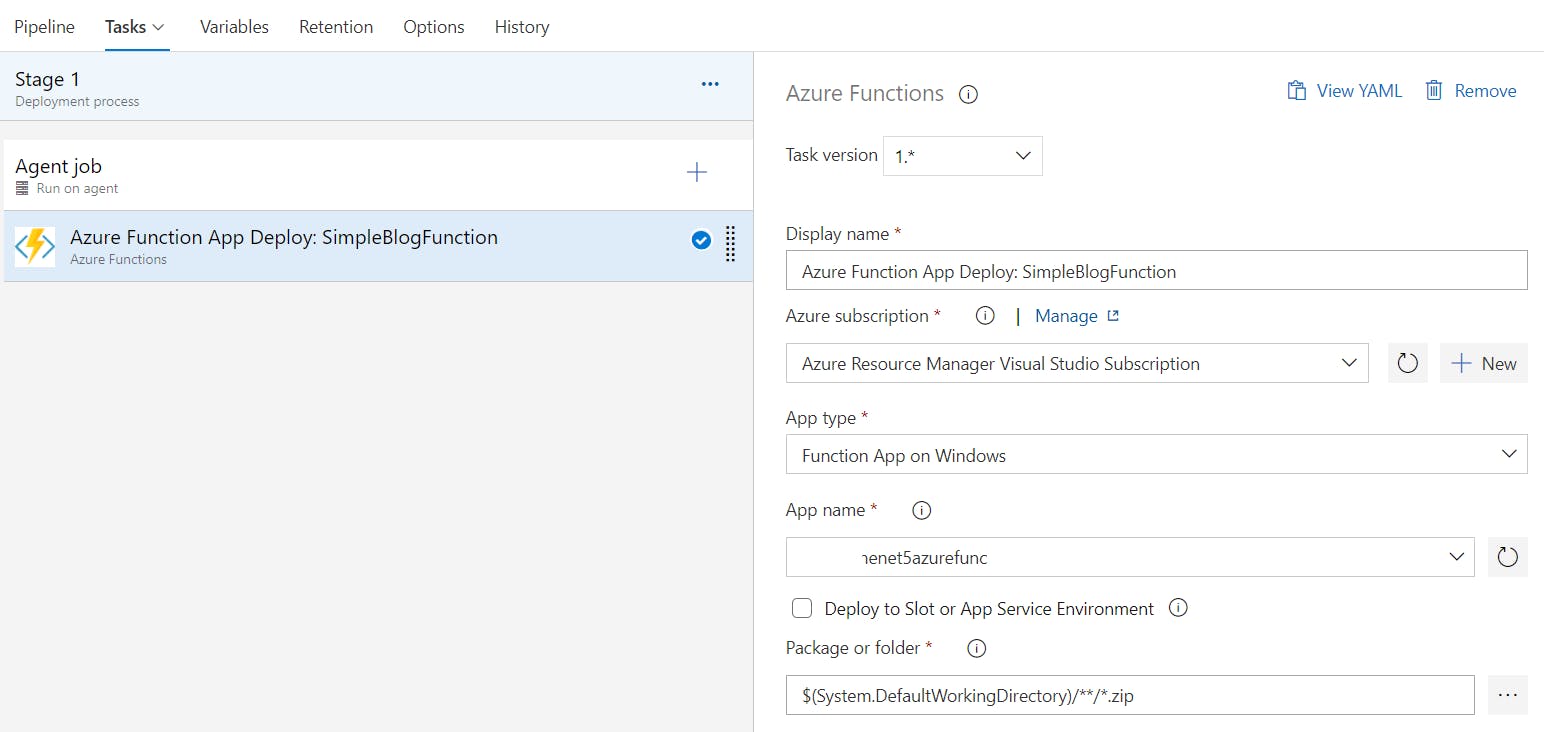
In this task Azure Subscription connection and how to create that connection found here and the select appropriate app type and function app.
Now add few release pipeline stage variable.
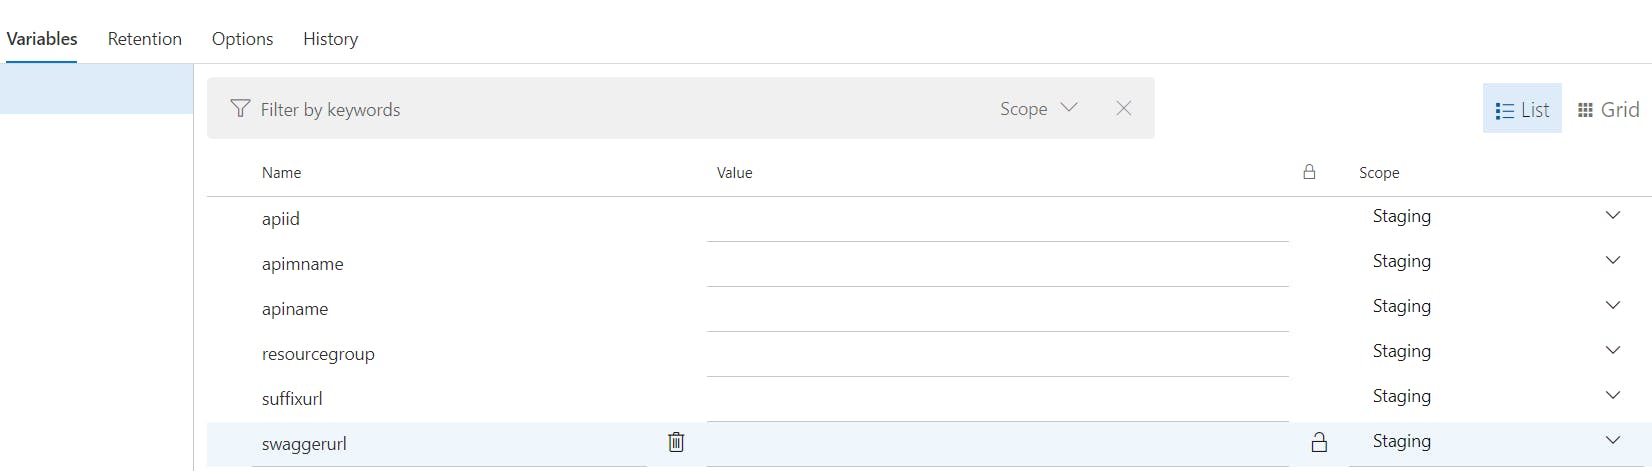
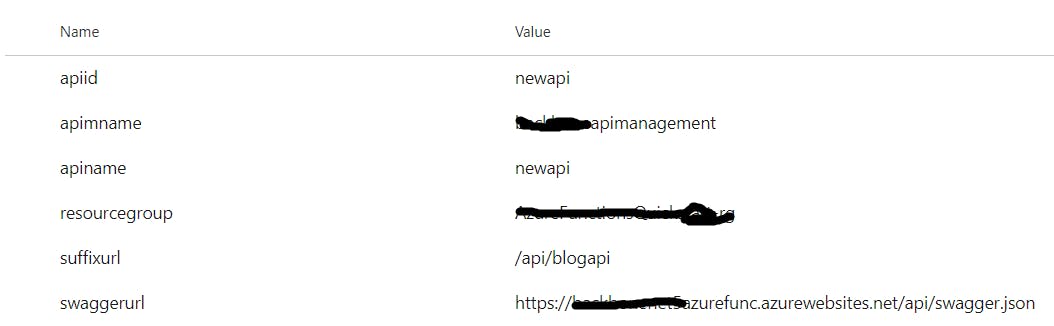
For example at my end.
Now add Azure Cli task and select the same subscription.
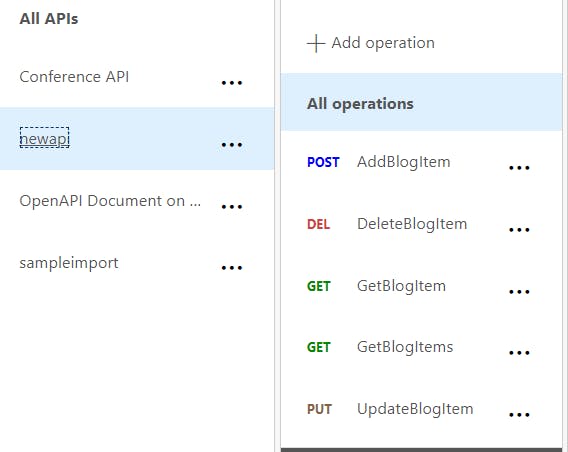
Once release pipeline execute successful. It will looks like following at Azure API-M.